Mulberry trees, known for their delicious berries and lush foliage, are a fantastic addition to any garden. Growing these trees from cuttings can be a rewarding and straightforward process, allowing you to propagate your own plants without the need for expensive nursery purchases. This article covers the easy approaches to growing mulberry trees from cuttings at home, ensuring your gardening journey is both fruitful and enjoyable.
Understanding Mulberry Trees
Types of Mulberry Trees
Latest Posts
- OnePlus Turbo 6V 5G Launched – for Gamers with 9000mAh Battery, 220MP Camera & Snapdragon 8s Gen 4
- Realme GT 8 Pro Officially Launched – 200MP Camera, 7,000mAh Battery and Snapdragon 8 Elite
- OPPO K13 Turbo 5G Launched – 7,000mAh Battery, 50MP Camera and High-Performance Chipset
- Realme 17 Pro 5G Unveiled – IP69K Certified, 200MP Camera and Massive 8600mAh Battery
- Vivo Premium Smartphone Launched – 200MP Camera, 90W Fast Charging and 16GB RAM
- POCO F8 Ultra Launched – Snapdragon Flagship Power, Bose Audio and Huge Battery
- POCO F8 Ultra Launched – Snapdragon Flagship Power, Bose Audio and Huge Battery
- OnePlus Nord 3 5G Launched – 120Hz AMOLED Display, 50MP Camera and 5,000mAh Battery
- OnePlus Nord CE4 Launched – Powerful Snapdragon 7 Gen 3, 50MP Camera and Long-Lasting Battery
- OnePlus Smartphone Revealed – Premium 5G Smartphone with 200MP Camera, 24GB RAM and 100W Fast Charging
Before diving into propagation, it’s essential to understand the types of mulberry trees you might want to cultivate:
- White Mulberry (Morus alba): Known for its sweet berries and rapid growth.
- Red Mulberry (Morus rubra): A native species with a rich flavor.
- Black Mulberry (Morus nigra): Valued for its rich flavor and dark color, though it may require more care.
Familiarizing yourself with these varieties will help you choose the one that suits your space and taste preferences best.
Benefits of Growing Mulberry Trees
- Biodiversity: Mulberries attract various wildlife, including birds and beneficial insects.
- Shade: Their large canopy provides excellent shade, making them perfect for backyard relaxation.
- Edible Fruits: Mulberries are not only tasty but also packed with vitamins.
Preparing to Grow from Cuttings
Gathering Supplies

To start growing mulberry trees from cuttings, you will need:
- Pruning shears: Sharp and clean for making clean cuts.
- Rooting hormone: Optional, but can help boost root formation.
- Soil: A well-draining potting mix is ideal.
- Containers: Small pots or trays to start your cuttings.
- Plastic bag or humidity dome: To maintain humidity for the cuttings.
Timing for Cutting
The best time to take cuttings is during the late spring or early summer when the tree is actively growing. However, semi-hardwood cuttings can be taken in late summer or early fall.
Taking Cuttings
-
Select Healthy Wood: Choose healthy, disease-free branches from the mother tree. Look for stems that are at least 6 to 8 inches long and have several leaf buds.
-
Make the Cut: Using pruning shears, make a clean cut just below a leaf node, which encourages root growth.
-
Prepare Cuttings:
- Remove the leaves from the bottom half of the cutting to minimize moisture loss.
- Optionally, dip the cut end into rooting hormone to stimulate root development.

Planting Cuttings
Preparing Containers
- Fill Containers: Fill your pots or trays with a light, well-draining potting mix.
- Moisten the Soil: Thoroughly moisten the potting mix but avoid making it soggy.
Planting Steps
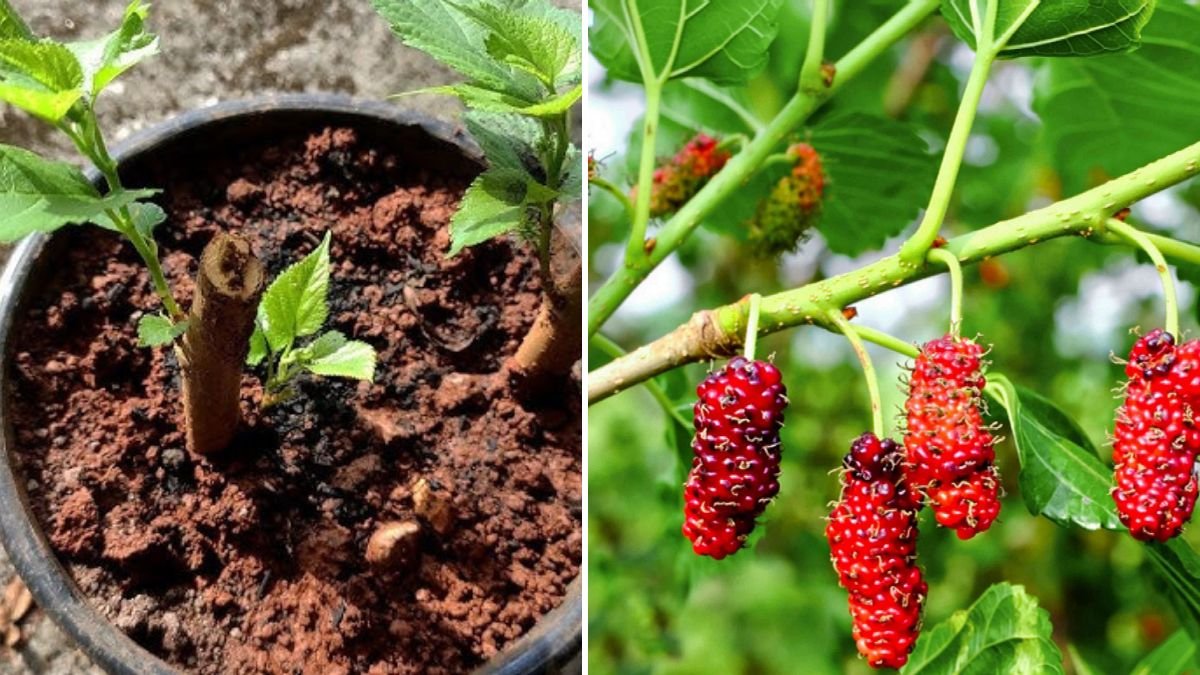
- Insert the Cutting: Create a hole in the soil using your finger or a pencil, then insert the cutting into the soil about one-third of its length. Press the soil lightly around the base to hold it in place.
- Spacing: If planting multiple cuttings, ensure they are spaced apart to allow for airflow.
Creating a Humid Environment
To encourage rooting, cover the pots with a plastic bag or place them under a humidity dome. This low humidity environment will help retain moisture in the soil and around the cutting.
Caring for Cuttings
Watering
Keep the soil consistently moist, but not waterlogged. Check the moisture level daily and water as needed. Overwatering can lead to rot, while underwatering can dry out the cuttings.
Light Requirements
Place the cuttings in a location that receives indirect sunlight. Too much direct sunlight can scorch the cuttings, while too little light can hinder growth.

Monitoring Growth
Check for roots after a few weeks by gently tugging on the cutting. If you feel resistance, the roots have started to develop. At this point, you can gradually acclimate the cuttings to outdoor conditions.
Transplanting
Once your cuttings have grown roots and are established (usually within a few months), it’s time to transplant them into larger pots or directly into your garden. Follow these steps:
-
Choose the Right Location: Select a sunny spot with well-draining soil. Mulberries prefer slightly acidic to neutral soil.
-
Prepare the Soil: Amend the garden soil with compost or other organic matter to enhance drainage and nutrients.
-
Transplant Carefully: Make a hole in the soil large enough to accommodate the roots without crowding. Gently place the cutting in the hole and cover it with soil, pressing down lightly around it.
-
Water: Water the newly transplanted tree well, ensuring the soil settles around the roots.
Maintenance of Mulberry Trees
Watering and Fertilization
Mulberry trees are relatively low-maintenance, but they do need regular watering, especially during dry spells. Fertilizing with a balanced fertilizer during the growing season can promote vigorous growth.

Pruning
Prune your mulberry trees yearly to encourage a strong structure, remove dead or damaged branches, and promote air circulation within the canopy.
Pest and Disease Management
Keep an eye out for common pests like aphids and spider mites. Early intervention with insecticidal soap or neem oil can help keep them in check. Additionally, ensure proper spacing between trees to mitigate fungal diseases.
Common Challenges
- Root Rot: Overwatering can lead to root rot. Maintain a good watering routine that ensures even moisture without saturation.
- Pests: Early detection of pests is crucial. Regular monitoring and maintaining plant health can prevent infestations.
- Climate Adaptability: Some mulberry species are more cold-hardy than others—understanding your plant’s needs can prevent failure in unsuitable climates.
FAQs
1. How long does it take for mulberry cuttings to root?
Typically, mulberry cuttings will root within 4 to 6 weeks, although it may take longer in colder temperatures.
2. Can I grow mulberries in pots?
Yes, mulberries can be successfully grown in pots. Just ensure the pot is large enough and has good drainage.
3. What is the best way to fertilize mulberry trees?
Use a balanced fertilizer in the spring as the tree comes out of dormancy. Organic options, like compost or well-rotted manure, are also beneficial.

4. How can I tell if my cutting has rooted?
Gently tug on the cutting; if there is resistance, it has likely developed roots. You can also look for new leaf growth as a sign of success.
5. Do mulberry trees need full sun?
Yes, mulberry trees prefer full sun and thrive best when they receive at least six hours of direct sunlight each day.
6. Why is my mulberry tree not producing fruit?
Lack of sunlight, insufficient nutrients, or improper watering can affect fruit production. Ensure your tree is healthy and in an appropriate environment.
7. Are mulberry trees invasive?
While some varieties can spread easily, most mulberry species are not classified as invasive. However, check local guidelines if you are planting near sensitive ecosystems.
Conclusion
Growing mulberry trees from cuttings at home is not only feasible but also a gratifying endeavor for gardeners of all levels. By following the outlined steps and nurturing your plants, you’ll soon enjoy the shade, beauty, and sweet fruits of your own mulberry trees. Happy gardening!