Elderberry, a member of the honeysuckle family, is a versatile and hardy plant known for its vibrant clusters of small white flowers and dark purple berries. Not only do elderberries make delightful jams, jellies, and wines, but they are also packed with nutrients and antioxidants. Growing elderberry bushes at home can be a rewarding experience, and with the right guidance, it can be done effortlessly. This guide will walk you through the essential steps to plant, care for, and harvest your elderberry bushes.
1. Understanding Elderberry Plants
1.1 Varieties of Elderberry
Latest Posts
- OnePlus Turbo 6V 5G Launched – for Gamers with 9000mAh Battery, 220MP Camera & Snapdragon 8s Gen 4
- Realme GT 8 Pro Officially Launched – 200MP Camera, 7,000mAh Battery and Snapdragon 8 Elite
- OPPO K13 Turbo 5G Launched – 7,000mAh Battery, 50MP Camera and High-Performance Chipset
- Realme 17 Pro 5G Unveiled – IP69K Certified, 200MP Camera and Massive 8600mAh Battery
- Vivo Premium Smartphone Launched – 200MP Camera, 90W Fast Charging and 16GB RAM
- POCO F8 Ultra Launched – Snapdragon Flagship Power, Bose Audio and Huge Battery
- POCO F8 Ultra Launched – Snapdragon Flagship Power, Bose Audio and Huge Battery
- OnePlus Nord 3 5G Launched – 120Hz AMOLED Display, 50MP Camera and 5,000mAh Battery
- OnePlus Nord CE4 Launched – Powerful Snapdragon 7 Gen 3, 50MP Camera and Long-Lasting Battery
- OnePlus Smartphone Revealed – Premium 5G Smartphone with 200MP Camera, 24GB RAM and 100W Fast Charging
There are two main types of elderberry: European (Sambucus nigra) and American (Sambucus canadensis). The European elderberry is often preferred for its larger berries and higher anthocyanin content, but both types thrive in similar conditions.
1.2 Benefits of Growing Elderberries
Elderberries are known for their immune-boosting properties and are rich in vitamins A, B, and C. They are also used in traditional medicine and have anti-inflammatory and antiviral properties. Additionally, elderberry bushes provide excellent habitat for wildlife, attracting birds and beneficial insects.
2. Choosing the Right Location
2.1 Sunlight Requirements
Elderberries thrive in full sun but can tolerate partial shade. Ideally, choose a location that receives at least 6 hours of direct sunlight daily to ensure a bountiful harvest.
2.2 Soil Conditions
Elderberries prefer moist, well-drained soil that is rich in organic matter. Before planting, conduct a soil test to determine pH levels. A slightly acidic to neutral pH (5.5 to 7.0) is ideal for elderberry growth.

2.3 Space Considerations
Elderberry bushes can grow quite large, up to 10-12 feet in height and width. Ensure you have enough space between plants. Ideally, plant elderberry bushes 6 to 10 feet apart to allow for healthy air circulation.
3. Planting Elderberry Bushes
3.1 When to Plant
The best time to plant elderberry bushes is in the spring or fall when temperatures are cooler. Spring planting allows the plant to establish its roots before the hot summer months, while fall planting gives it a jumpstart for the next growing season.
3.2 Preparing the Soil
- Clear the Area: Remove weeds, grass, and debris from the planting site.
- Amend the Soil: Incorporate compost or well-rotted manure to enhance soil fertility and drainage.
- Dig a Hole: Create a hole that is three times wider than the root ball and slightly shallower than the height of the root ball.
3.3 Planting Process
- Position the Plant: Place the elderberry in the hole, ensuring the root crown is level with the soil surface.
- Backfill: Fill the hole with soil, gently tamping it down to remove air pockets.
- Water Thoroughly: Once planted, give the bush a deep watering to help settle the soil around the roots.

4. Caring for Elderberry Bushes
4.1 Watering
Elderberry bushes require consistent moisture, especially in the first few years. Water them regularly, ensuring the soil remains moist but not waterlogged. During hot, dry spells, you may need to water more frequently.
4.2 Fertilizing
Fertilization is typically not required in the first year, as elderberries can thrive on well-amended soil. However, in subsequent years, a balanced, slow-release fertilizer can be applied in early spring to promote vigorous growth.
4.3 Pruning
Pruning elderberry bushes helps maintain their shape and encourages new growth.
- Timing: Prune in late winter or early spring before new growth begins.
- Technique: Remove dead or damaged branches, as well as any crossing branches that may cause crowding. For older bushes, consider cutting back a few of the oldest stems to the base to rejuvenate growth.
4.4 Pest and Disease Management

Elderberries are generally resistant to many pests and diseases. However, keep an eye out for common issues like aphids, spider mites, and fungal infections:
- Pests: Use insecticidal soap or neem oil as a natural pesticide when necessary.
- Diseases: Ensure good air circulation and avoid overhead watering to prevent fungal diseases.
5. Harvesting Elderberries
5.1 When to Harvest
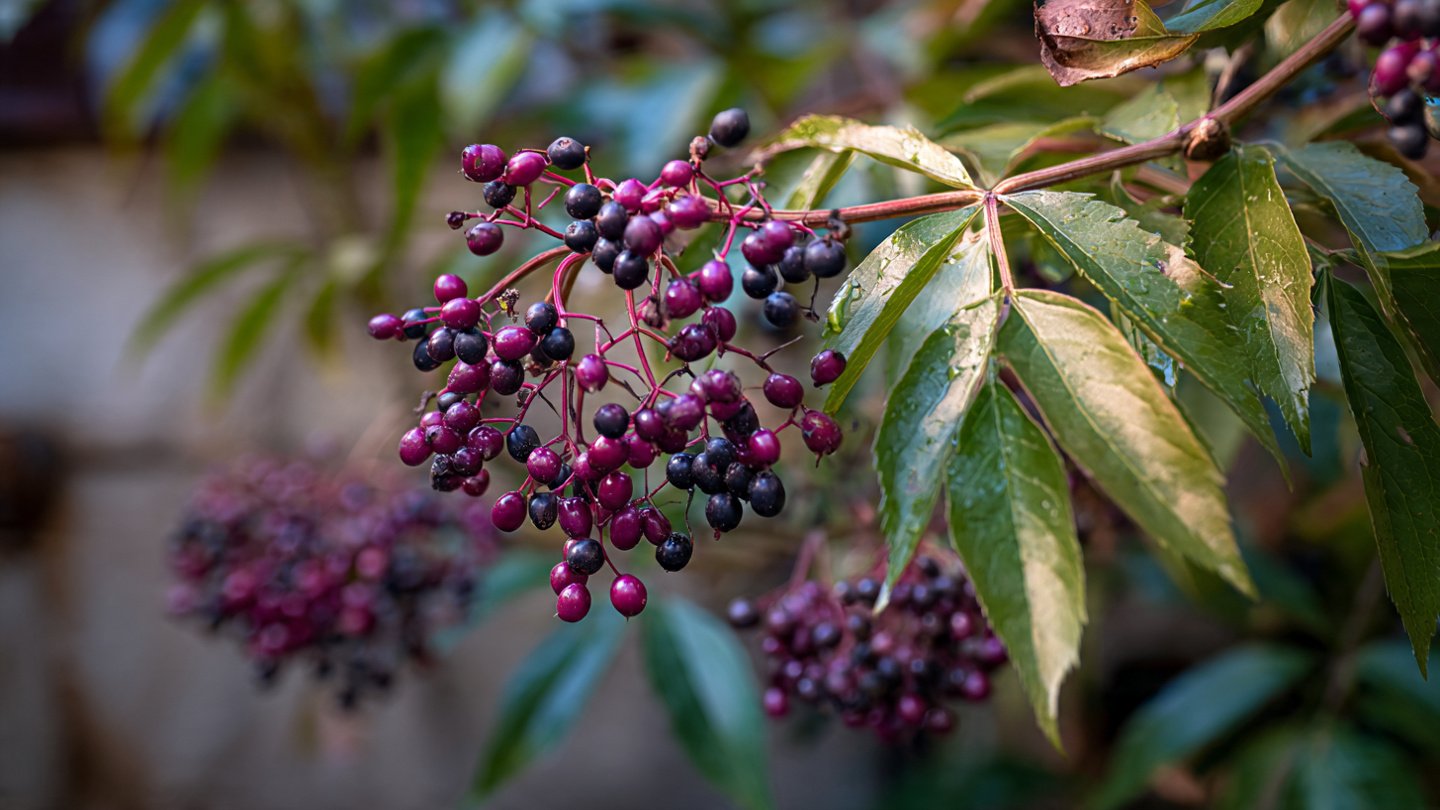
Elderberries typically ripen in late summer to early fall. Berries are ready for harvesting when they turn a deep purple and are shiny.
5.2 Harvesting Techniques
- Equip Yourself: Use gloves to protect your hands since elderberry stems can cause skin irritation.
- Cut Clusters: Use scissors or pruning shears to cut the entire cluster of berries from the bush.
- Avoid Overripe Berries: Overripe berries can attract pests; pick them before they fall off the cluster.
5.3 Post-Harvest
After harvesting, remove the berries from the stems and rinse them thoroughly. They can be used fresh or stored in the freezer for later use.

6. Using Your Elderberries
Fresh elderberries can be used in various recipes, including:
- Jams and Jellies: Cook the berries with sugar and pectin for delicious spreads.
- Syrups: Create an elderberry syrup to drizzle on pancakes or to use in drinks.
- Wines and Liqueurs: Brew elderberry wine or liqueurs for delightful homemade beverages.
FAQs About Growing Elderberry Bushes
Q1: How fast do elderberry bushes grow?
Elderberry bushes can grow quite rapidly, often reaching up to 10 feet in height within three years under optimal conditions.
Q2: Can I grow elderberries in containers?
Yes, elderberries can be grown in large containers, but ensure that the pot has proper drainage and is large enough (at least 15 gallons) to accommodate the roots.
Q3: Do elderberries need a pollinator?

While some elderberry varieties are self-pollinating, planting more than one bush improves fruit set and yield.
Q4: Are elderberries safe to eat raw?
Raw elderberries should not be eaten in large quantities as they can be toxic when unripe. Cooking elderberries neutralizes any harmful substances.
Q5: How do I propagate elderberry bushes?
Elderberries can be propagated through cuttings or by sowing seeds. For cuttings, take a 6-inch section from a healthy branch in spring or fall, place it in soil, and keep it moist until roots develop.
Conclusion
Growing elderberry bushes at home doesn’t have to be a daunting task. With proper planning, care, and management, you can enjoy a bountiful harvest of these nutritious berries. Not only will you reap the benefits of elderberries in your culinary endeavors, but you’ll also contribute to your garden’s ecosystem. So pick up your gardening tools, find the perfect spot, and start your journey into the rewarding world of elderberry cultivation!