Malabar spinach, also known as Basella alba, is a vigorous, tropical vine that thrives in warm climates. With its thick, succulent leaves and mild flavor, it is a popular addition to various dishes and, importantly, is packed with vitamins and minerals. For home gardeners looking to diversify their vegetable choices, Malabar spinach offers a rewarding growing experience. This guide will cover everything you need to know about successfully growing Malabar spinach in your home garden.
Understanding Malabar Spinach
What is Malabar Spinach?
Latest Posts
- OnePlus Turbo 6V 5G Launched – for Gamers with 9000mAh Battery, 220MP Camera & Snapdragon 8s Gen 4
- Realme GT 8 Pro Officially Launched – 200MP Camera, 7,000mAh Battery and Snapdragon 8 Elite
- OPPO K13 Turbo 5G Launched – 7,000mAh Battery, 50MP Camera and High-Performance Chipset
- Realme 17 Pro 5G Unveiled – IP69K Certified, 200MP Camera and Massive 8600mAh Battery
- Vivo Premium Smartphone Launched – 200MP Camera, 90W Fast Charging and 16GB RAM
- POCO F8 Ultra Launched – Snapdragon Flagship Power, Bose Audio and Huge Battery
- POCO F8 Ultra Launched – Snapdragon Flagship Power, Bose Audio and Huge Battery
- OnePlus Nord 3 5G Launched – 120Hz AMOLED Display, 50MP Camera and 5,000mAh Battery
- OnePlus Nord CE4 Launched – Powerful Snapdragon 7 Gen 3, 50MP Camera and Long-Lasting Battery
- OnePlus Smartphone Revealed – Premium 5G Smartphone with 200MP Camera, 24GB RAM and 100W Fast Charging
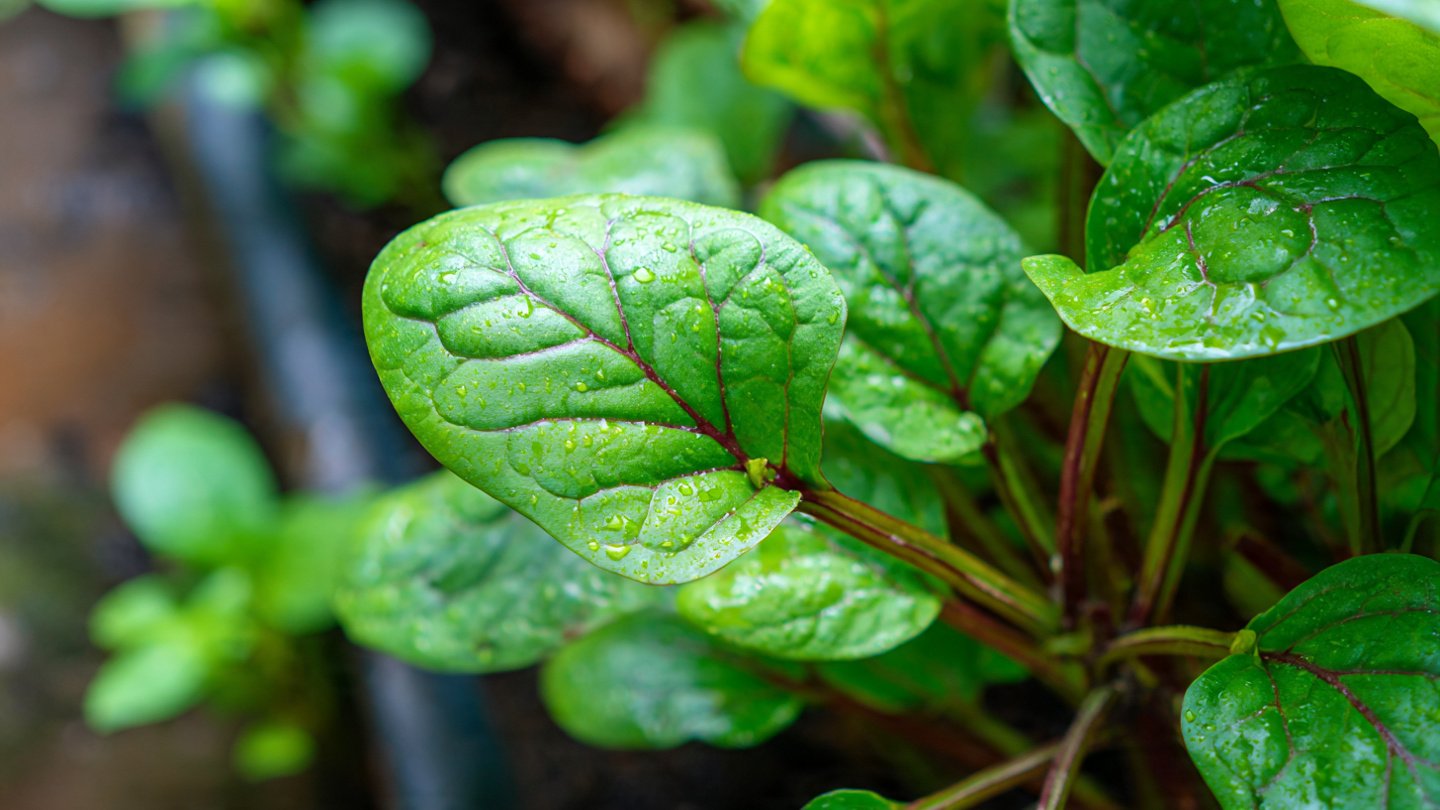
Malabar spinach is not a true spinach but belongs to the Basellaceae family. Unlike traditional spinach, it prefers warm temperatures and is grown primarily in tropical and subtropical climates. Its leaves are thick and glossy, ranging in color from dark green to deep burgundy, which makes it not only delicious but also visually appealing.
Nutritional Benefits
Malabar spinach is rich in several essential nutrients, including:
- Vitamins A and C: Support healthy vision and an effective immune response.
- Calcium: Vital for bone health.
- Iron: Important for blood production.
- Antioxidants: Help combat oxidative stress.
Preparing to Grow Malabar Spinach
Climate Requirements
Malabar spinach grows best in warm conditions. Ideal temperatures range between 70°F to 90°F (21°C to 32°C). It is sensitive to frost, so it’s essential to wait until all danger of frost has passed before planting.

Choosing the Right Location
Select a location in your garden that receives full sun to partial shade. Malabar spinach thrives with at least 4 to 6 hours of sunlight daily. Ensure the area has well-drained soil, as the plant prefers moist but not waterlogged conditions.
Soil Preparation
Malabar spinach prefers rich, organic soil with a pH level between 6.0 and 7.0. Preparing the soil involves:
- Testing the Soil: Perform a soil pH test.
- Amending the Soil: Incorporate compost or well-rotted manure to enhance soil fertility and structure.
- Tilling: Loosen the soil to ensure proper drainage and root development.
Planting Malabar Spinach
Propagation Methods
Malabar spinach can be grown from seeds or cuttings. Here’s how to propagate each way:
From Seed
- Soak the Seeds: Soak seeds overnight in water to promote germination.
- Sowing: Plant seeds about 1 inch apart, ½ inch deep in rows, or scatter them in a designated area. Ideally, sow seeds in spring after the last frost.
From Cuttings

- Select a Healthy Stem: Choose a healthy, green stem.
- Cut: Snip a 6-inch piece to use as a cutting.
- Plant: Place the cutting directly into moist soil, burying it approximately 2 inches deep.
Spacing
To allow the Malabar spinach to spread and climb, space plants about 12 to 18 inches apart.
Caring for Malabar Spinach
Watering
Consistent moisture is crucial for healthy growth. Water your Malabar spinach deeply but infrequently, allowing the soil to dry slightly between watering. Overwatering can lead to root rot, so ensure proper drainage.
Fertilization
Although Malabar spinach grows well in nutrient-rich soil, additional fertilization can enhance growth:
- Organic Fertilizers: Use balanced organic fertilizers every 4-6 weeks during the growing season.
- Foliar Feeding: Consider liquid seaweed or fish emulsion as a foliar feed to promote leaf development.
Supporting the Vines
As a climbing vine, Malabar spinach needs support. You can use:

- Trellises: Erect a trellis or support structure at the time of planting.
- Fencing: Use garden fencing for additional support.
Pest and Disease Management
Common Pests
Though Malabar spinach is relatively pest-resistant, be aware of:
- Aphids: These small insects can infest the foliage. Remove them manually or with water spray.
- Spider Mites: Look for webbing on leaves; a proper spray of water can help control them.
Diseases
- Powdery Mildew: This can affect the leaves in humid conditions. Ensure good air circulation and avoid overhead watering.
- Root Rot: Caused by overwatering, ensure proper drainage and moderate irrigation.
Harvesting Malabar Spinach
When to Harvest
Harvesting typically begins about 6 to 8 weeks after planting. Leaves can be picked once they reach a size suitable for consumption. Regular harvesting encourages the plant to produce more foliage.

How to Harvest
- Cutting: Use scissors or garden shears to snip leaves, avoiding damage to the plant.
- Timing: Harvest in the morning when leaves are crisp and full of moisture.
Seasonality
Malabar spinach can be harvested throughout the growing season, typically from mid-summer to the first frost.
Culinary Uses
Malabar spinach can be used in a variety of dishes:
- Stir-Fries: Add to stir-fries as a leafy green.
- Soups: Incorporate into soups for added nutrition.
- Salads: Use fresh leaves in salads for a unique texture.
FAQs
1. Can Malabar spinach be grown indoors?
Yes, Malabar spinach can be grown in pots indoors as long as it receives enough sunlight. A south-facing window is ideal.
2. How does Malabar spinach compare to regular spinach?

Malabar spinach has a thicker texture and a milder flavor than regular spinach. It is also heat-tolerant, making it suitable for warmer climates.
3. Is Malabar spinach perennial or annual?
Malabar spinach is typically grown as an annual in temperate regions but can be a perennial in tropical climates where it does not experience frost.
4. How can I save seeds from my Malabar spinach?
Once the flowers have bloomed and the seeds have formed, you can collect the seeds from dried pods. Store them in a cool, dry place until the next planting season.
5. What are the best companion plants for Malabar spinach?
Companion plants include beans, corn, and other vining plants that can provide support and share nutrients without competing for resources.
6. Are there any health risks associated with consuming Malabar spinach?
Malabar spinach is generally safe to consume. However, those with a history of kidney stones should limit their intake due to its oxalate content.
Conclusion
Growing Malabar spinach in your home garden provides a unique opportunity to enjoy a nutritious, tropical vegetable. By understanding the plant’s needs and taking proper care, you can reap a bountiful harvest. Whether you are a seasoned gardener or a beginner, adding Malabar spinach to your garden can be a delightful and rewarding experience. Enjoy the taste, nutrition, and lush appearance of this unique vine in your meals. Happy gardening!