Growing garlic at home is not only easy but incredibly rewarding. Whether you are an experienced gardener or just starting, cultivating garlic can enrich your culinary experiences while providing numerous health benefits. This guide will take you through the simple steps to successfully grow garlic at home, along with some frequently asked questions to help steer your gardening endeavor.
Why Grow Garlic?
Before we dive into the growing process, let’s briefly discuss why you may want to grow garlic at home:
- Freshness: Homegrown garlic is fresher and more flavorful than store-bought options.
- Variety: You can choose from different types that suit your taste.
- Health Benefits: Garlic is known for its numerous health benefits, including boosting the immune system and providing anti-inflammatory properties.
- Satisfaction: There’s a unique sense of satisfaction in growing your own food.
What You’ll Need
Before planting, gather the following supplies:

- Seeds: Purchase seed garlic from a reputable nursery or gardening store. Choose hardneck or softneck varieties based on your climate and taste preferences.
- Soil: Well-draining, nutrient-rich soil is crucial.
- Trowel: For digging and planting.
- Mulch: To help retain moisture and suppress weeds.
- Watering Can: For hydrating your plants.
Step-by-Step Guide to Growing Garlic
Step 1: Choosing the Right Time to Plant
Garlic is typically planted in the fall (around 4-6 weeks before the ground freezes) or late winter/early spring. Here are some tips:
- Fall Planting: Ideal for hardneck garlic varieties.
- Spring Planting: Suitable for softneck varieties.
Step 2: Prepare the Soil
- Location: Choose a spot that receives at least 6-8 hours of sun per day.
- Soil Testing: Test your soil pH; garlic thrives in mildly acidic to neutral pH (6.0-7.0).
- Soil Preparation: Clear weeds and debris from the area, then till the soil. Mix in compost or well-rotted manure to enhance fertility.
Step 3: Select and Prepare Garlic Bulbs
- Choosing Bulbs: Select healthy, large garlic bulbs free from disease. Smaller bulbs can produce smaller heads.
- Separation: Gently break apart the bulb into individual cloves. Avoid bruising them; larger cloves will yield larger bulbs.
Step 4: Planting Cloves
- Planting Depth: Dig holes or furrows about 2 inches deep.
- Spacing: Space cloves 4-6 inches apart, with the pointed end facing upward.
- Cover: Backfill the soil over the cloves and gently tamp it down.
Step 5: Watering
Garlic requires consistent moisture, especially during its initial growth. Here’s how to water effectively:
Latest Posts
- OnePlus Turbo 6V 5G Launched – for Gamers with 9000mAh Battery, 220MP Camera & Snapdragon 8s Gen 4
- Realme GT 8 Pro Officially Launched – 200MP Camera, 7,000mAh Battery and Snapdragon 8 Elite
- OPPO K13 Turbo 5G Launched – 7,000mAh Battery, 50MP Camera and High-Performance Chipset
- Realme 17 Pro 5G Unveiled – IP69K Certified, 200MP Camera and Massive 8600mAh Battery
- Vivo Premium Smartphone Launched – 200MP Camera, 90W Fast Charging and 16GB RAM
- POCO F8 Ultra Launched – Snapdragon Flagship Power, Bose Audio and Huge Battery
- POCO F8 Ultra Launched – Snapdragon Flagship Power, Bose Audio and Huge Battery
- OnePlus Nord 3 5G Launched – 120Hz AMOLED Display, 50MP Camera and 5,000mAh Battery
- OnePlus Nord CE4 Launched – Powerful Snapdragon 7 Gen 3, 50MP Camera and Long-Lasting Battery
- OnePlus Smartphone Revealed – Premium 5G Smartphone with 200MP Camera, 24GB RAM and 100W Fast Charging
- Initial Watering: After planting, water thoroughly.
- Ongoing Watering: Water once or twice weekly during dry spells, keeping the soil moist but not soggy.
Step 6: Mulching
Apply a layer of mulch (straw, grass clippings, or shredded leaves) around the garlic beds. This will help retain moisture, control weeds, and keep the soil temperature regulated.

Step 7: Fertilizing
Garlic benefits from additional nutrients. Follow these guidelines:
- Initial Fertilization: Apply a balanced fertilizer or compost when planting.
- Mid-Season Boost: Add another round of fertilizer in early spring as the plants start growing.
Step 8: Watching for Growth
- Emergence: Garlic shoots will start to break through the soil in early spring.
- Maintenance: Keep the area weed-free and monitor for pests. Common pests include aphids and onion maggots.
Step 9: Watering and Care During Growth
Maintain a regular watering schedule, especially during dry spells. Ensure garlic receives at least 1 inch of water per week.
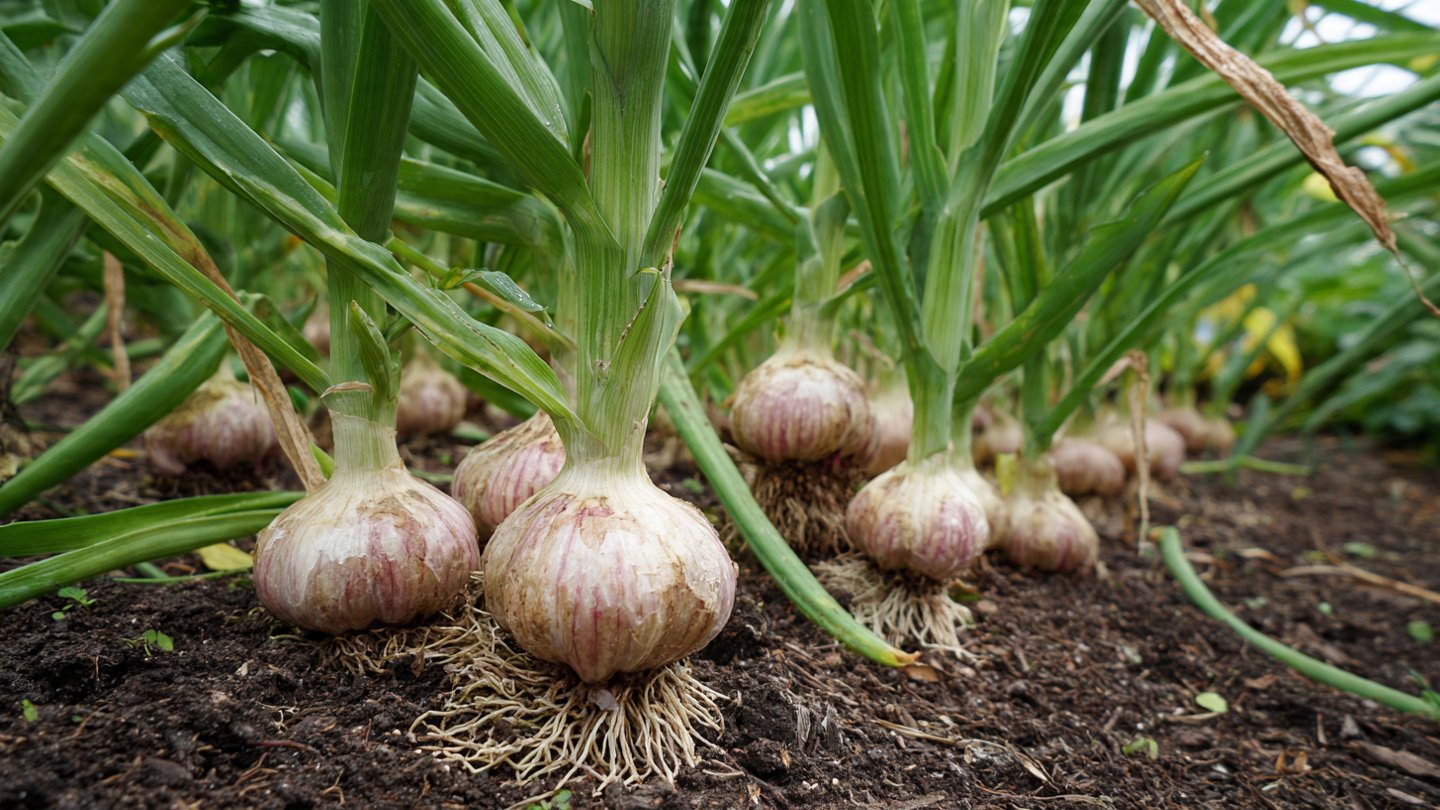
Step 10: Harvesting Garlic
- Timing: Garlic is usually ready for harvest in mid to late summer when the lower leaves start to yellow and dry out.
- Method: Use a garden fork or trowel to carefully lift the bulbs without damaging them.
Step 11: Curing Garlic
- Curing Process: After harvesting, remove any soil and place the garlic in a cool, dry, and airy location away from sunlight for about 2-3 weeks.
- Storage: Once cured, trim the roots and stems. Store garlic in a cool, dark, and dry place. Properly cured garlic can last for several months.
Troubleshooting Common Issues
- Pests: Watch out for insects and treat them with organic pesticides.
- Diseases: Crop rotation is essential to avoid diseases. If you notice any disease symptoms, remove affected plants immediately.
- Poor Growth: If your garlic is not growing well, check for factors like soil quality, watering, and sunlight exposure.
Frequently Asked Questions (FAQ)
Q1: Can I use garlic bulbs from the grocery store to plant?
A1: While it’s possible, store-bought garlic is often treated to prevent sprouting. For the best results, use certified seed garlic.

Q2: How long does it take for garlic to grow?
A2: Garlic typically takes 6-8 months from planting to harvest, depending on the variety and growing conditions.
Q3: What type of garlic should I plant?
A3: Choose between hardneck and softneck varieties based on your climate and preferences. Hardneck varieties are generally more cold-tolerant, while softneck types are better for warmer climates and longer storage.
Q4: How much sunlight does garlic need?
A4: Garlic thrives in full sun, requiring at least 6-8 hours of direct sunlight per day.

Q5: Can I grow garlic in containers?
A5: Yes, garlic can be grown in containers as long as the pots are at least 8-12 inches deep and provide good drainage.
Q6: How do I know when garlic is ready to harvest?
A6: Garlic is ready to harvest when lower leaves start to yellow and dry out, but be sure to leave some green leaves to allow for further growth.
Q7: What should I do if my garlic is not sprouting?
A7: Ensure you’re using healthy cloves, check soil temperature, and verify that they are adequately watered. Garlic typically requires 60°F or higher soil temperature for sprouting.

Q8: Is garlic a perennial plant?
A8: Garlic is usually grown as an annual crop, though some varieties can be grown as perennials in certain climates.
Conclusion
Growing garlic at home is a fulfilling and relatively easy process that can enhance your gardening skills and improve your cooking. By following these simple steps, you can enjoy the satisfaction of planting, nurturing, and harvesting your own garlic. With a little patience and care, you’ll reap the rewards of your hard work with flavorful and fresh bulbs right from your garden. Enjoy your gardening journey!
Leave a Reply