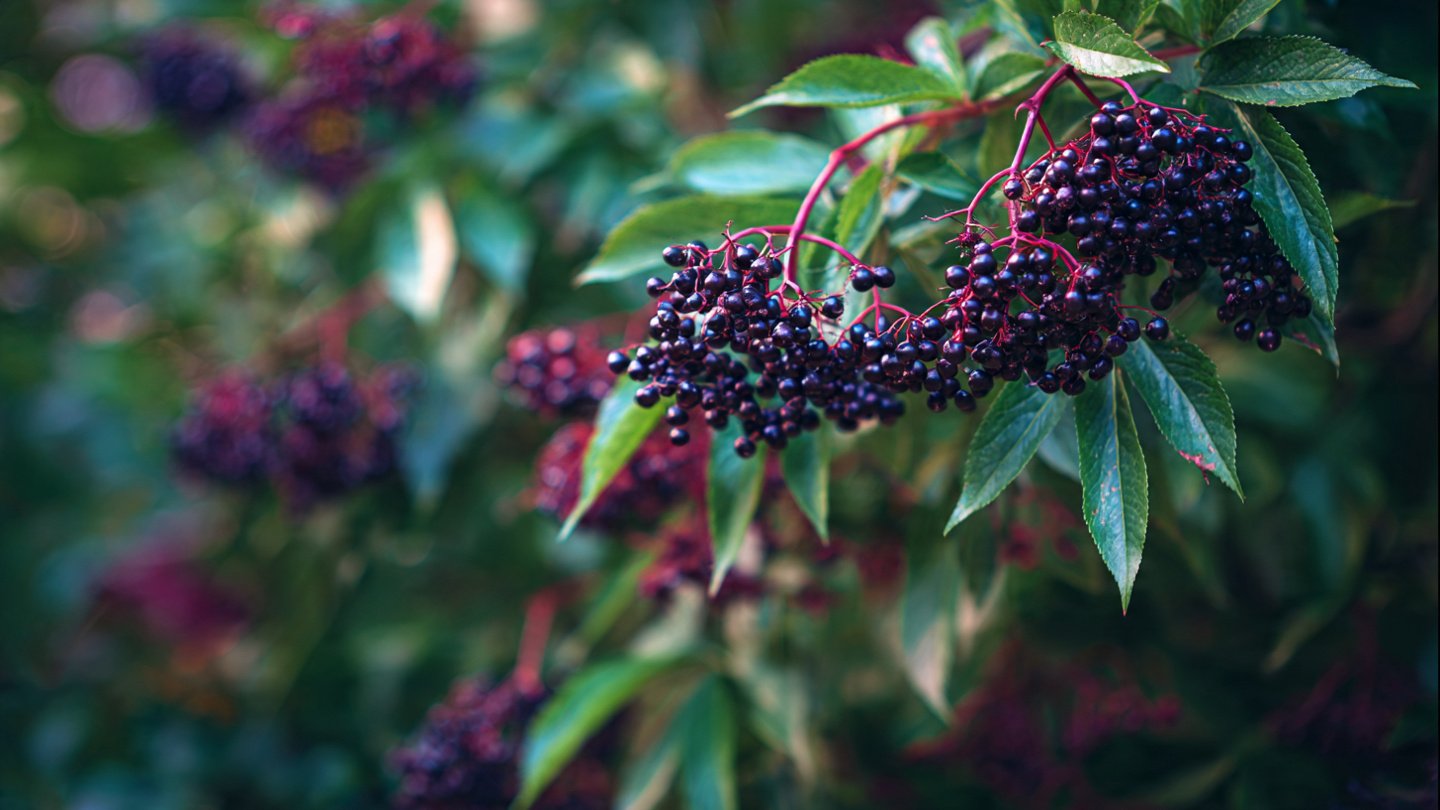
Elderberry bushes (Sambucus nigra) are not only beautiful, but they also produce delicious berries that are packed with antioxidants and vitamins. Often used to make syrups, jams, and even wine, elderberries can be a fantastic addition to your garden. This guide provides you with all the information needed to grow elderberry bushes at home, ensuring success without unnecessary hassle.
Table of Contents
- OnePlus Turbo 6V 5G Launched – for Gamers with 9000mAh Battery, 220MP Camera & Snapdragon 8s Gen 4
- Realme GT 8 Pro Officially Launched – 200MP Camera, 7,000mAh Battery and Snapdragon 8 Elite
- OPPO K13 Turbo 5G Launched – 7,000mAh Battery, 50MP Camera and High-Performance Chipset
- Realme 17 Pro 5G Unveiled – IP69K Certified, 200MP Camera and Massive 8600mAh Battery
- Vivo Premium Smartphone Launched – 200MP Camera, 90W Fast Charging and 16GB RAM
- POCO F8 Ultra Launched – Snapdragon Flagship Power, Bose Audio and Huge Battery
- POCO F8 Ultra Launched – Snapdragon Flagship Power, Bose Audio and Huge Battery
- OnePlus Nord 3 5G Launched – 120Hz AMOLED Display, 50MP Camera and 5,000mAh Battery
- OnePlus Nord CE4 Launched – Powerful Snapdragon 7 Gen 3, 50MP Camera and Long-Lasting Battery
- OnePlus Smartphone Revealed – Premium 5G Smartphone with 200MP Camera, 24GB RAM and 100W Fast Charging
- Why Grow Elderberry?
- Choosing the Right Variety
- Where to Plant Elderberries
- Soil Preparation
- Planting Elderberry Bushes
- Caring for Elderberry Bushes
- Harvesting Elderberries
- Common Issues and Solutions
- Preserving Elderberries
- FAQs
Latest Posts
1. Why Grow Elderberry?

Elderberry plants are celebrated for their numerous health benefits. The berries are rich in vitamins A and C, iron, potassium, and antioxidants. Beyond their health properties, elderberries are also easy to grow and can thrive in a variety of conditions, making them suitable for both novice and experienced gardeners. Furthermore, the beautiful white flowers in spring and vibrant leaves throughout the season add aesthetic appeal to your garden.
2. Choosing the Right Variety
There are several varieties of elderberry, each with unique characteristics. Here are a few popular ones:
- American Elderberry (Sambucus canadensis): Thrives in North America, known for its high antioxidant content.
- European Elderberry (Sambucus nigra): Common in Europe, produces larger berries and sweeter flowers.
- Black Lace (Sambucus nigra ‘Black Lace’): Known for its striking dark foliage and fragrant flowers, this variety is often used for ornamental purposes.
When selecting a variety, consider your local climate, intended use, and aesthetic preferences.
3. Where to Plant Elderberries
Elderberry bushes prefer full sun to partial shade. They require at least 6 hours of direct sunlight per day for optimal growth and berry production. Here are some optimal conditions:
- Sunlight: Full sun to partial shade
- Spacing: Plant bushes 6-10 feet apart for proper air circulation and growth
- Protection: Choose a location shielded from high winds, which can damage the branches

4. Soil Preparation
Elderberries are adaptable but prefer well-draining soil rich in organic matter. Here’s how to prepare the soil:
- Testing Soil pH: Elderberries thrive in slightly acidic to neutral soils with a pH of 5.5 to 7.0. Use a soil test kit to check.
- Adding Organic Matter: Incorporate compost or well-rotted manure into the soil to improve fertility and drainage.
- Improving Drainage: If your soil is dense or clay-based, consider adding perlite or sand to aid in drainage.
5. Planting Elderberry Bushes
The best time to plant elderberries is in early spring or fall. Here are the steps to follow:
- Digging the Hole: Create a hole that is two times wider than the root ball and deep enough to accommodate the roots without bending.
- Placing the Plant: Position the bush in the center of the hole, ensuring that the top of the root ball is level with the soil surface.
- Backfilling: Fill the hole with soil, gently packing it to eliminate air pockets. Water thoroughly after planting.

6. Caring for Elderberry Bushes
Elderberries are relatively low-maintenance, but they do require some attention. Here are key care tips:
- Watering: Keep the soil consistently moist, especially during dry spells. Established bushes can tolerate drought, but regular watering promotes better berry production.
- Mulching: Apply a 2-3 inch layer of organic mulch around the base to retain moisture, suppress weeds, and maintain a consistent soil temperature.
- Fertilizing: Applying a balanced fertilizer in early spring can boost growth and berry production. Avoid over-fertilizing, which can lead to excessive foliage growth at the expense of berries.
7. Harvesting Elderberries
Elderberries usually ripen in late summer to early fall. Here’s how to know when they are ready to be harvested:
- Color: Berries should be dark purple to black.
- Taste: Sample a few—ripe elderberries are sweet with a slight tartness. Remember that raw berries should not be consumed in large quantities, as they can cause stomach upset.
To harvest, cut the cluster of berries, then remove them from the stems as they contain toxic compounds.
8. Common Issues and Solutions

Even though elderberries are hardy, they can be susceptible to pests and diseases. Here are some common issues and how to tackle them:
- Pests: Aphids and spider mites can be an issue. Use insecticidal soap or neem oil to manage infestations.
- Fungal Diseases: If you notice leaf spots, powdery mildew, or wilted plants, remove affected leaves and ensure proper air circulation.
- Wilting or Yellow Leaves: This could indicate root rot or overwatering. Ensure you have well-draining soil and reduce watering frequency.
9. Preserving Elderberries
Elderberries can be preserved in several ways. Here are the most popular methods:
- Freezing: Wash and dry the berries, then place them in airtight freezer bags. They can last for up to six months in the freezer.
- Making Syrups or Jams: Cook the berries with sugar and water to create delicious syrups or jams that can be stored in sealed jars.
- Dehydrating: Dry elderberries using a dehydrator or by air-drying for later use in teas or baking.
10. FAQs
Q1: How long does it take for elderberry bushes to produce berries?
A: Typically, elderberries will begin to produce berries 2-3 years after planting.

Q2: Can I grow elderberries in pots?
A: Yes, elderberries can be grown in large pots. Ensure the pot has good drainage and is at least 5 gallons in size.
Q3: Do elderberry bushes need a pollinator?
A: While some elderberry varieties are self-pollinating, planting multiple bushes can enhance fruit production and yield.
Q4: Are elderberries toxic when raw?
A: Yes, raw elderberries (especially in large quantities) can cause nausea. Always cook elderberries before consumption.
Q5: How do I know if my elderberries are ready to harvest?
A: Ripe elderberries should be dark purple to black and sweet with a slight tartness. Harvest when fully colored.
Q6: How do I prune elderberry bushes?
A: Prune elderberries in late winter to early spring, removing dead or crossing branches to improve air circulation.
Conclusion
Growing elderberry bushes at home can be an easy and rewarding endeavor. With minimal hassle, you can cultivate these stunning and beneficial plants in your garden. Whether you’re looking to create delicious syrups, jams, or simply enjoy their beauty, elderberry bushes are well worth the effort. By following this guide, you’ll be well on your way to enjoying a fruitful elderberry harvest! Happy gardening!
Leave a Reply