Elderberries, derived from the Sambucus genus, are a cherished fruit found in various regions worldwide. Known for their rich flavor, vibrant color, and extensive health benefits, elderberries have become increasingly popular among home gardeners. Whether for consumption, medicinal purposes, or simply enhancing the landscape, growing elderberry bushes in your backyard can be a rewarding venture. This article delves into easy methods to cultivate elderberry bushes for fresh berries, making it easy for you to enjoy their many benefits.
Understanding Elderberry Bushes
Types of Elderberry
Latest Posts
- OnePlus Turbo 6V 5G Launched – for Gamers with 9000mAh Battery, 220MP Camera & Snapdragon 8s Gen 4
- Realme GT 8 Pro Officially Launched – 200MP Camera, 7,000mAh Battery and Snapdragon 8 Elite
- OPPO K13 Turbo 5G Launched – 7,000mAh Battery, 50MP Camera and High-Performance Chipset
- Realme 17 Pro 5G Unveiled – IP69K Certified, 200MP Camera and Massive 8600mAh Battery
- Vivo Premium Smartphone Launched – 200MP Camera, 90W Fast Charging and 16GB RAM
- POCO F8 Ultra Launched – Snapdragon Flagship Power, Bose Audio and Huge Battery
- POCO F8 Ultra Launched – Snapdragon Flagship Power, Bose Audio and Huge Battery
- OnePlus Nord 3 5G Launched – 120Hz AMOLED Display, 50MP Camera and 5,000mAh Battery
- OnePlus Nord CE4 Launched – Powerful Snapdragon 7 Gen 3, 50MP Camera and Long-Lasting Battery
- OnePlus Smartphone Revealed – Premium 5G Smartphone with 200MP Camera, 24GB RAM and 100W Fast Charging
Before diving into cultivation, it’s important to know the different types of elderberry bushes. The two most common are:
-
American Elderberry (Sambucus canadensis): Native to North America, American elderberries are large and juicy. They thrive in various climates and are easier to cultivate.
-
European Elderberry (Sambucus nigra): This variety is found primarily in Europe. While less hardy than its American counterpart, its berries are often considered more flavorful, making it popular worldwide.
Health Benefits of Elderberries
Elderberries are celebrated for their nutritional value. They are packed with antioxidants, vitamins A, B, and C, and minerals like potassium and iron. Studies suggest that elderberries may boost immunity, fight flu symptoms, and reduce inflammation.
Cultivation Basics
Choosing the Right Location
Elderberries require full sun to partial shade. A location that gets at least six to eight hours of sunlight daily is ideal. Planting in well-draining soil rich in organic matter will contribute to the healthy growth of elderberry bushes.
Soil Preparation

Elderberries thrive in slightly acidic to neutral soil (pH 5.5 to 7.0). To prepare your garden bed:
-
Clear the Area: Remove any weeds, grass, and debris.
-
Amend the Soil: Mix in compost or well-rotted manure to enrich the existing soil. This improves drainage and adds essential nutrients.
-
Test the pH: You can use a soil testing kit to determine pH levels. Adjust using lime to raise pH or sulfur to lower it, if necessary.
Planting Elderberries
Elderberry bushes can be grown from seeds, cuttings, or nursery plants. Here’s how to plant using nursery plants, the easiest method for beginners:
-
Select Healthy Plants: Look for strong, healthy plants with robust root systems.
-
Space the Plants: For optimal growth, space elderberry bushes about 6 to 10 feet apart. They can grow 6 to 12 feet tall and wide.
-
Dig the Holes: Create holes deep enough to accommodate the roots without bending them.
-
Planting: Place the bush in the hole, ensuring the top of the root ball is level with the soil surface. Fill the hole with soil, pressing gently to eliminate air pockets.

-
Watering: Water thoroughly after planting to help settle the soil around the roots.
Ongoing Care
Watering
Elderberry bushes prefer moist soil but dislike sitting in water. Regularly check soil moisture, especially during dry spells. A weekly watering schedule is generally sufficient but adjust based on weather conditions.
Fertilizing
Apply a balanced fertilizer in early spring and again in late summer. This encourages healthy growth and berry production. Follow product instructions for application rates.
Pruning
Pruning is essential for maintaining healthy growth:
-
Timing: Late winter or early spring, before new growth appears, is the best time to prune.
-
Technique: Remove dead or damaged branches, and thin out congested areas to improve air circulation.
-
Shaping: Shape the shrub to promote an open structure, allowing sunlight to reach all parts of the plant.

Pest and Disease Management
Elderberries can be susceptible to pests like aphids, spider mites, and Japanese beetles. Regularly inspect your plants for signs of infestation and use organic insecticidal soap if necessary.
Fungal diseases such as powdery mildew can also pose a threat. Ensure proper spacing and airflow around the plants to mitigate these risks, and avoid overhead watering.
Supporting Pollinators
Elderberry bushes are self-pollinating but benefit from cross-pollination. Planting multiple varieties nearby can enhance berry production while also attracting honeybees and butterflies, further contributing to garden biodiversity.
Harvesting Elderberries
Elderberry clusters typically ripen in late summer to early fall. Here’s how to know when they are ready and how to harvest them:
-
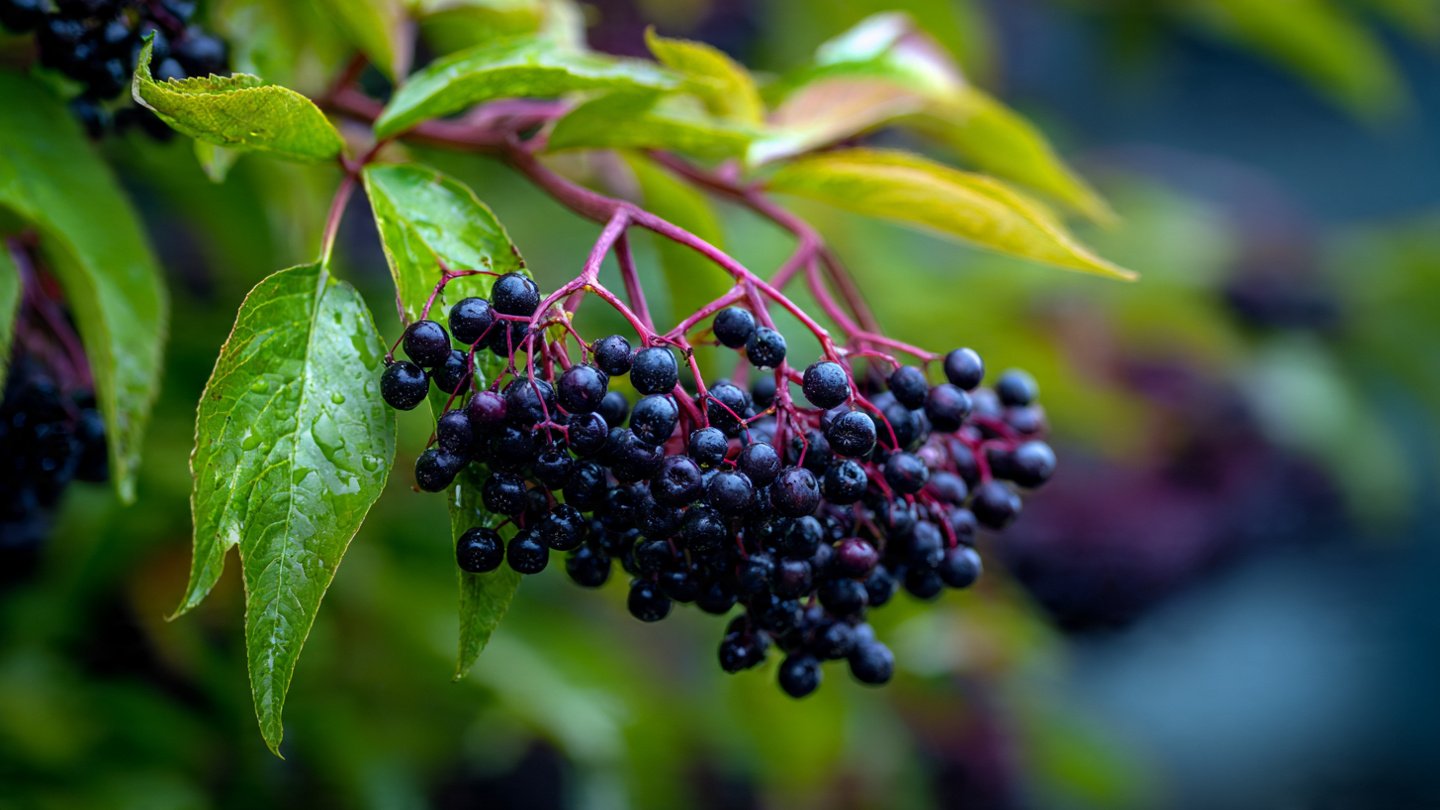
Observation: Ripe elderberries turn dark purple or black and are slightly soft to touch. Ensure no berries are green, as they can be toxic.
-
Harvesting: Use garden scissors to cut entire clusters from the bush. Remember to wear gloves, as the stems can be mildly toxic.
-
Storing: Fresh elderberries can be stored in the refrigerator for a few days. For longer storage, consider freezing, making jams, or dehydrating them.
Utilizing Elderberries
There are numerous ways to enjoy the fruits of your labor:

-
Jams and Jellies: Elderberries can be cooked down into delicious jams and jellies.
-
Wines and Cordials: Fermenting elderberries yields delightful wines and cordials.
-
Syrups: Elderberry syrups are popular for their health benefits and can be used to enhance beverages and baked goods.
-
Medicinal Uses: Elderberry extracts and capsules are available for boosting immunity.
-
Culinary Uses: Use elderberries in pies, smoothies, or as a topping for pancakes.
Conclusion
Growing elderberry bushes in your backyard is not only an enriching gardening experience but also a pathway to enjoying healthful and delicious berries. By following these easy methods— from site selection and soil preparation to ongoing care and harvesting— you can successfully cultivate elderberries. Embrace the process and look forward to the time when you can savor the fruits of your labor right from your backyard.
FAQs
Q1: Are elderberry bushes easy to grow?
Yes, elderberry bushes are relatively easy to grow. They adapt to various soil types and climates, making them suitable for many home gardeners.
Q2: How long does it take for elderberries to produce fruit?

Elderberry bushes typically take about 2-3 years to produce fruit after planting.
Q3: Can I grow elderberries in containers?
Yes, elderberry bushes can be grown in large containers. Ensure they have sufficient space for root development and proper drainage.
Q4: Is the elderberry plant toxic?
While the berries are safe to eat when cooked, other parts of the plant, like the leaves and seeds, can be toxic if consumed raw. Always cook elderberries before consumption.
Q5: How do I propagate elderberry bushes?
Elderberry bushes can be propagated through cuttings or seeds. However, using cuttings is the most common method due to its higher success rate.
Q6: Can elderberries be grown in shade?
Elderberries can tolerate partial shade but will produce better yields in full sun. Aim for at least six hours of sunlight for optimal growth.
Q7: What is the best time to plant elderberry bushes?
The best time to plant elderberry bushes is in early spring or fall when the soil is moist, and temperatures are moderate.
By understanding these easy cultivation methods and caring for your elderberry bushes, you can enjoy fresh, nutritious berries right from your own backyard. Happy gardening!
Leave a Reply