Growing sapota, also known as chiku (Manilkara zapota), can be a rewarding endeavor for any home gardener. This tropical fruit tree is appreciated for its sweet, grainy flesh and can thrive in a variety of conditions. This guide will help you cultivate sapota from seed using minimal resources, providing you with a delicious harvest in your own backyard.
Understanding Sapota
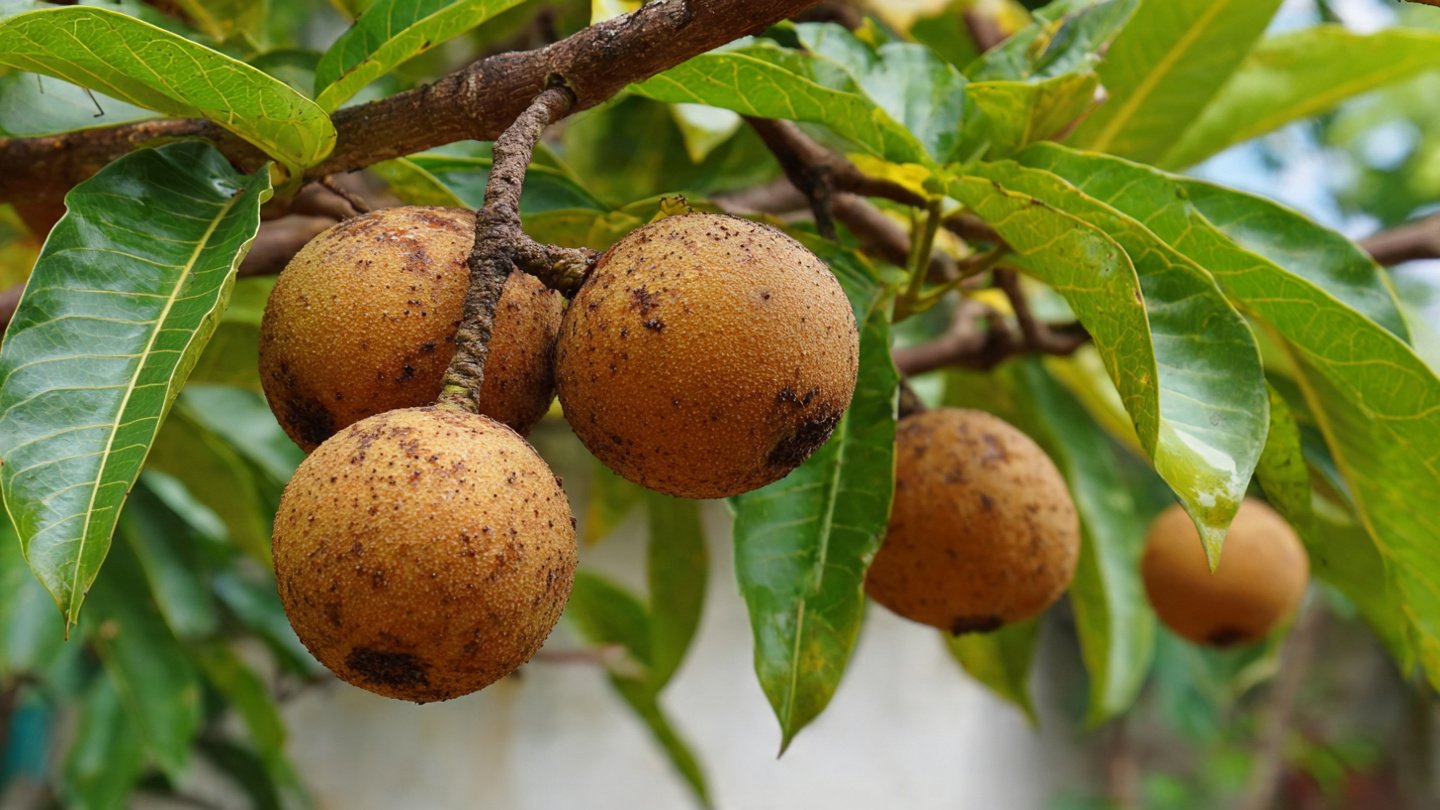
Sapota is native to Mexico, Central America, and parts of the Caribbean. The tree typically grows to a height of 30 to 40 feet but can be pruned to maintain a manageable size. The fruit is brown and has a unique flavor that resembles a mix of pear and brown sugar.
Latest Posts
- OnePlus Turbo 6V 5G Launched – for Gamers with 9000mAh Battery, 220MP Camera & Snapdragon 8s Gen 4
- Realme GT 8 Pro Officially Launched – 200MP Camera, 7,000mAh Battery and Snapdragon 8 Elite
- OPPO K13 Turbo 5G Launched – 7,000mAh Battery, 50MP Camera and High-Performance Chipset
- Realme 17 Pro 5G Unveiled – IP69K Certified, 200MP Camera and Massive 8600mAh Battery
- Vivo Premium Smartphone Launched – 200MP Camera, 90W Fast Charging and 16GB RAM
- POCO F8 Ultra Launched – Snapdragon Flagship Power, Bose Audio and Huge Battery
- POCO F8 Ultra Launched – Snapdragon Flagship Power, Bose Audio and Huge Battery
- OnePlus Nord 3 5G Launched – 120Hz AMOLED Display, 50MP Camera and 5,000mAh Battery
- OnePlus Nord CE4 Launched – Powerful Snapdragon 7 Gen 3, 50MP Camera and Long-Lasting Battery
- OnePlus Smartphone Revealed – Premium 5G Smartphone with 200MP Camera, 24GB RAM and 100W Fast Charging
Benefits of Growing Sapota at Home
- Freshness: Homegrown sapota is fresh and free from harmful pesticides.
- Cost-Effective: Once established, the tree requires minimal investment.
- Sustainability: Growing sapota contributes to a more sustainable lifestyle.
- Aesthetic Appeal: The tree adds beauty and shade to your garden.
Choosing the Right Location
Climate Conditions
Sapota thrives in tropical and subtropical climates with minimal frost. The ideal temperature range is between 25°C and 35°C (77°F to 95°F). It’s essential to choose a location that receives full sunlight for at least 6 hours a day.

Soil Requirements
Sapota prefers well-drained, sandy loam soil rich in organic matter. It can tolerate poor soils but requires good drainage to avoid root rot. Conducting a soil test can help determine pH levels; sapota thrives in slightly acidic to neutral soil (pH 6 to 7.5).
Growing Sapota from Seed
Step 1: Collecting Seeds
You can obtain sapota seeds from ripe fruits purchased at a grocery store or farmer’s market. Choose healthy, fully ripe fruits that yield to pressure.
Step 2: Seed Preparation
- Clean the Seeds: Remove the seeds from the fruit and wash them to remove any pulpy residue.
- Drying: Allow the seeds to air dry for 1-2 days in a cool, shaded area. This step helps in preventing mold.
Step 3: Germination
- Soaking: Soak the seeds in water for 24 hours to speed up germination.
- Planting: Fill seed trays or small pots with a mixed soil of compost and sand. Plant the seeds about an inch deep, spacing them at least 2-3 inches apart.

Step 4: Care for Germinating Seeds
- Watering: Water the soil gently to avoid displacing the seeds. Keep the soil consistently moist but not waterlogged.
- Temperature: Maintain a warm environment (around 25°C to 30°C) to promote germination, which may take 2-6 weeks.
- Light: Once seedlings emerge, provide them with bright light but avoid direct sunlight until they are a few inches tall.
Step 5: Transplanting Seedlings
Once seedlings reach about 6 inches tall and have several true leaves, they can be transplanted:
- Hardening Off: Before transplanting, acclimate the seedlings to outdoor conditions by placing them outside for a few hours each day, gradually increasing their exposure time over a week.
- Digging the Hole: Choose a sunny spot and dig a hole twice the size of the root ball. Add some compost to enrich the soil.
- Transplanting: Gently remove the seedlings from their pots and place them in the hole. Fill the hole with soil and water thoroughly.
Ongoing Care for Your Sapota Tree
Watering

Sapota trees are drought-tolerant once established, but they need regular watering during the first few years. Water deeply but infrequently to encourage deep root growth.
Fertilizing
Using organic fertilizers will improve the yield and health of your sapota tree. Apply a balanced organic fertilizer every 3-4 months, particularly during the growing season.
Pruning
Pruning helps maintain the tree’s shape and promotes better airflow around the branches. Remove any dead or damaged branches, and thin the canopy if it becomes too dense.
Pest and Disease Management
While sapota is relatively pest-resistant, keep an eye out for common pests such as fruit flies and aphids. Handpicking pests and using neem oil can effectively manage infestations.
Harvesting Sapota
Sapota typically takes 5 to 7 years to bear fruit when grown from seed, but patience will reward you with a bountiful harvest. The fruit can be harvested when it turns brown and yields slightly to pressure.
Ripening

After harvesting, allow the fruit to ripen at room temperature for a few days until it becomes soft.
Minimal Resource Tips
- Use Recycled Containers: For germinating seeds, use old pots or any container with drainage holes.
- Compost: Create your own compost using kitchen scraps and garden waste.
- Rainwater: Collect rainwater for irrigation to conserve water and nurture your plants.
- Natural Mulch: Use straw, leaves, or grass clippings as mulch to retain soil moisture and suppress weeds.
- Keeping It Simple: Start with just a few seeds and expand as you gain confidence.
FAQs
1. How long does it take for a sapota tree to bear fruit?
It generally takes 5 to 7 years for a sapota tree grown from seed to start producing fruit.
2. Can sapota grow in pots?
Yes, sapota can be grown in large containers, but keep in mind the tree will eventually grow tall and may need to be transplanted to the ground.
3. What pests should I be aware of?
Common pests include fruit flies, aphids, and scale insects. Regular monitoring and organic pest control methods can help manage these.

4. How often should I water my sapota tree?
Water the young sapota tree regularly, especially during dry spells. Once established, it requires less frequent watering.
5. Can I grow sapota in a cooler climate?
Sapota prefers warm climates, but you can try growing it in pots and moving them indoors during colder months.
6. What kind of soil is best for growing sapota?
Well-drained, sandy loam soil enriched with organic matter is ideal for sapota.
7. How can I tell when the sapota fruit is ripe?
The fruit should be brown and yield slightly to gentle pressure when ripe.
Conclusion
Growing sapota from seed in your backyard is a gratifying and ecological project that can be accomplished with minimal resources. From preparing seeds to nurturing the tree, the journey is filled with learning and satisfaction. With patience and care, you’ll soon enjoy the delicious tropical flavors of homegrown sapota. Happy gardening!
Leave a Reply