The Jamun tree, scientifically known as Syzygium cumini, is native to South Asia and is widely appreciated for its nutritious and delicious fruit. Known by many names like Indian blackberry and Java plum, this tree not only adds beauty to your garden but also provides a bountiful harvest. If you’re interested in cultivating your own Jamun tree from seed, this comprehensive guide will lead you through the entire process, ensuring healthy growth and abundant yields.
1. Understanding the Jamun Tree
Before you start the journey of growing a Jamun tree from seed, it’s important to understand its characteristics:
Latest Posts
- OnePlus Turbo 6V 5G Launched – for Gamers with 9000mAh Battery, 220MP Camera & Snapdragon 8s Gen 4
- Realme GT 8 Pro Officially Launched – 200MP Camera, 7,000mAh Battery and Snapdragon 8 Elite
- OPPO K13 Turbo 5G Launched – 7,000mAh Battery, 50MP Camera and High-Performance Chipset
- Realme 17 Pro 5G Unveiled – IP69K Certified, 200MP Camera and Massive 8600mAh Battery
- Vivo Premium Smartphone Launched – 200MP Camera, 90W Fast Charging and 16GB RAM
- POCO F8 Ultra Launched – Snapdragon Flagship Power, Bose Audio and Huge Battery
- POCO F8 Ultra Launched – Snapdragon Flagship Power, Bose Audio and Huge Battery
- OnePlus Nord 3 5G Launched – 120Hz AMOLED Display, 50MP Camera and 5,000mAh Battery
- OnePlus Nord CE4 Launched – Powerful Snapdragon 7 Gen 3, 50MP Camera and Long-Lasting Battery
- OnePlus Smartphone Revealed – Premium 5G Smartphone with 200MP Camera, 24GB RAM and 100W Fast Charging
1.1. Description
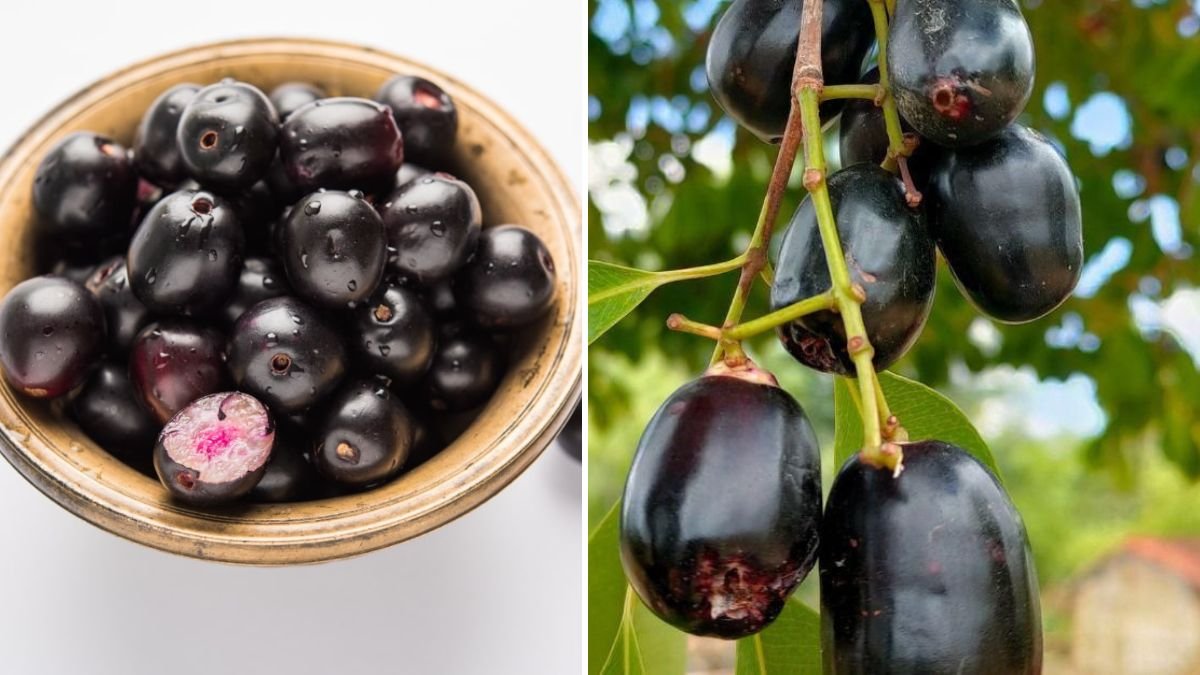
The Jamun tree is a medium to large evergreen tree, reaching heights of 30-40 feet. Its dense canopy offers ample shade and consists of glossy, dark green leaves. The tree produces fragrant white flowers that develop into small, oval-shaped fruits, which change from green to purple as they ripen.
1.2. Climate
The Jamun tree thrives in tropical and subtropical climates. It prefers well-draining, sandy to loamy soil and can tolerate a range of pH levels. Being a drought-resistant tree, it can survive periods of limited water but requires regular moisture during its initial growth phase.
2. Sourcing Seeds
The first step is to obtain quality Jamun seeds. You can collect seeds from ripe Jamun fruit, which can often be found in local markets or grocery stores.
2.1. Seed Preparation
- Selecting Ripe Fruits: Choose fully ripened Jamun fruits. The color should be a deep purple or black.
- Extracting the Seeds: Cut the fruits in half and extract the seeds. Rinse the seeds thoroughly to remove any residual fruit pulp.
- Drying: Place the seeds on a paper towel in a shady spot for a few days to dry. This preparation encourages germination.

3. Germination Process
The next step is to germinate the seeds, which can be done using several methods.
3.1. Direct Sowing
- Choosing the Right Time: Plant the seeds during the monsoon or just before the rainy season. This ensures sufficient moisture for germination.
- Planting: Create a small hole in the soil, about half an inch deep. Place a seed in each hole and cover lightly with soil.
- Watering: Water the area gently to avoid displacing the seeds. Be consistent with watering during the germination phase.
3.2. Seedling Propagation
If you prefer to start your seeds indoors:
- Seedling Tray: Fill a seedling tray with a mix of potting soil and compost.
- Planting Seeds: Sow the seeds in each cell, covering them lightly with soil.
- Moisture Maintenance: Keep the soil consistently moist and place the tray in a warm, airy location. A greenhouse can be an ideal spot.
- Transplanting: Once seedlings are 4–6 inches tall and have developed at least two sets of leaves, transplant them into individual pots or directly into the ground.

4. Planting the Seedlings
4.1. Site Selection
Choose a sunny spot in your garden. Ensure the location has good drainage to avoid water logging.
4.2. Soil Preparation
Improve the soil by mixing in compost or well-rotted manure. This will enhance soil fertility and structure.
4.3. Planting Procedure
- Digging the Hole: Dig a hole large enough to accommodate the root system, approximately 2 feet wide and deep.
- Placing the Seedling: Carefully place the seedling in the hole and fill it with soil while gently packing it around the base.
- Watering: Water the newly planted seedling thoroughly to settle the soil.
5. Care and Maintenance
Proper care is crucial for the health and productivity of a Jamun tree.

5.1. Watering
- Frequency: Water regularly during the first two years, especially during dry spells. Once established, the tree is relatively drought-resistant.
- Method: Use deep watering practices to encourage deep root growth.
5.2. Fertilization
- Organic Fertilizer: Apply compost or well-rotted manure twice a year.
- Balanced Fertilizer: Use a balanced NPK fertilizer during the growth phase, especially in spring.
5.3. Pruning
Regular pruning helps shape the tree and promotes healthy growth. Remove any dead or diseased branches and thin out crowded areas.
5.4. Pest Control
Be vigilant for pests such as aphids and mealybugs. Using insecticidal soap or neem oil can help control infestations organically.
6. Harvesting Jamun Fruits
6.1. When to Harvest
Jamun fruits typically ripen during the summer months, generally from June to August in temperate regions. The fruits are ready for harvesting when they turn a deep purple and have a sweet aroma.

6.2. Harvesting Technique
Gently twist the fruit to detach it from the stem to avoid damaging the tree.
7. Challenges and Solutions
7.1. Slow Growth
If the tree isn’t growing as expected, it may be due to poor soil conditions or insufficient watering. Regular applications of organic fertilizers can boost growth.
7.2. Diseases
Watch for signs of fungal infections or root rot, especially in overly damp conditions. Ensure proper spacing to promote air circulation around the tree.
FAQs
Q1: How long does it take for a Jamun tree to bear fruit?
A1: Typically, a Jamun tree can start bearing fruit within 4 to 8 years, depending on the growing conditions.
Q2: Can I grow a Jamun tree in a pot?
A2: Yes! You can grow a Jamun tree in a large pot, ensuring it has enough space for root development. Use well-draining soil and ensure it receives adequate sunlight.

Q3: Is Jamun safe for pets?
A3: Yes, Jamun is generally safe for pets in moderation, but excessive consumption may lead to digestive issues.
Q4: What are the health benefits of Jamun?
A4: Jamun is rich in vitamins, antioxidants, and minerals. It is known for its benefits in managing diabetes, improving digestion, and promoting healthy skin.
Q5: How much sunlight does a Jamun tree need?
A5: Jamun trees thrive in full sunlight, needing at least 6-8 hours of direct sun each day for optimal growth.
Conclusion
Growing a Jamun tree from seed can be a rewarding adventure that yields delicious fruits for years to come. By ensuring the right conditions for germination, diligent care, and monitoring for potential problems, you can enjoy a healthy tree and a bountiful harvest. Whether you’re cultivating it for personal enjoyment or considering it for larger-scale agricultural purposes, following these guidelines will lead to successful cultivation and enjoyment of this beautiful tree.
Happy gardening!
Leave a Reply