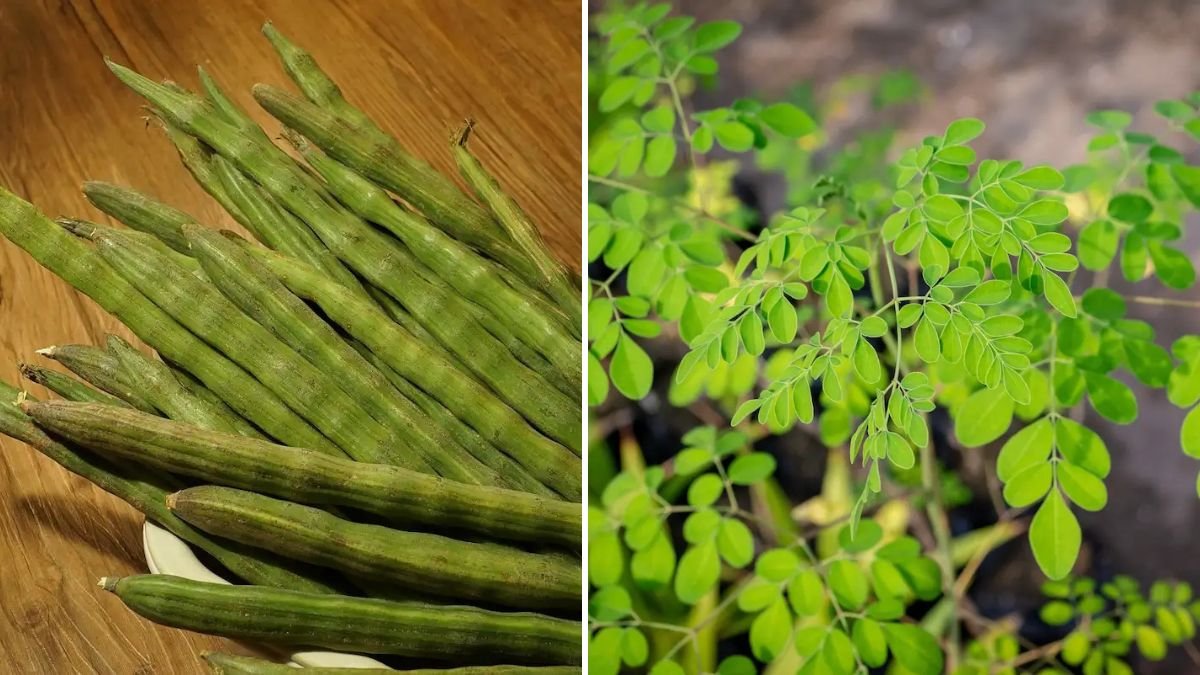
Moringa, often referred to as the drumstick tree, is celebrated for its nutritional value and health benefits. Originating from the Indian subcontinent, this miraculous plant thrives in tropical and subtropical climates. Whether you want to enjoy fresh drumstick leaves for your dishes or utilize their numerous health benefits, growing your own Moringa can be both fulfilling and practical. In this article, we will explore the best practices for cultivating Moringa leaves in your backyard throughout the year, along with an FAQ section to address your common inquiries.
What is Moringa?
Moringa oleifera is a fast-growing, drought-resistant tree known for its nutrient-rich leaves, pods, and seeds. Often deemed a superfood, drumstick leaves contain essential vitamins, minerals, and antioxidants. They are commonly used in various cuisines, particularly in Indian and African dishes, and are praised for their health benefits, which include improved digestion, reduced inflammation, and enhanced overall well-being.
Benefits of Moringa Leaves
- Nutritional Superstore: Moringa leaves are packed with vitamins A, C, and E, calcium, potassium, and iron.
- Anti-inflammatory Properties: They contain compounds that help combat inflammation in the body.
- Antioxidant Effects: The leaves are rich in antioxidants that neutralize harmful free radicals.
- Blood Sugar Regulation: Some studies suggest Moringa can help lower blood sugar levels.
- Digestive Health: The leaves are a great source of fiber, aiding in digestion.
Why Grow Moringa at Home?
Growing Moringa in your backyard offers several advantages:
- Convenience: Having fresh Moringa leaves at your disposal makes it easy to incorporate them into meals.
- Cost-effective: Growing your own is much cheaper than buying them regularly from the store.
- Sustainable: By cultivating your own Moringa, you can ensure it is grown without pesticides or harmful chemicals.
Getting Started: Initial Preparations
1. Selecting the Right Location
Moringa loves sunlight. Choose a spot in your backyard that receives full sun for at least 6 to 8 hours a day. It thrives in well-draining soils, so ensure the area is not prone to waterlogging.

2. Soil Preparation
Moringa prefers sandy loam or well-drained soils. Here’s how to prepare the soil:
Latest Posts
- OnePlus Turbo 6V 5G Launched – for Gamers with 9000mAh Battery, 220MP Camera & Snapdragon 8s Gen 4
- Realme GT 8 Pro Officially Launched – 200MP Camera, 7,000mAh Battery and Snapdragon 8 Elite
- OPPO K13 Turbo 5G Launched – 7,000mAh Battery, 50MP Camera and High-Performance Chipset
- Realme 17 Pro 5G Unveiled – IP69K Certified, 200MP Camera and Massive 8600mAh Battery
- Vivo Premium Smartphone Launched – 200MP Camera, 90W Fast Charging and 16GB RAM
- POCO F8 Ultra Launched – Snapdragon Flagship Power, Bose Audio and Huge Battery
- POCO F8 Ultra Launched – Snapdragon Flagship Power, Bose Audio and Huge Battery
- OnePlus Nord 3 5G Launched – 120Hz AMOLED Display, 50MP Camera and 5,000mAh Battery
- OnePlus Nord CE4 Launched – Powerful Snapdragon 7 Gen 3, 50MP Camera and Long-Lasting Battery
- OnePlus Smartphone Revealed – Premium 5G Smartphone with 200MP Camera, 24GB RAM and 100W Fast Charging
- Test the Soil pH: The ideal pH range for Moringa is between 6.0 and 7.0.
- Add Organic Matter: Mix in well-rotted compost or organic manure to enrich the soil.
- Drainage: If your soil retains water, consider building raised beds for better drainage.
3. Choosing the Right Seeds
Select high-quality Moringa seeds from a reputable source. If you are in a cooler climate but want to grow Moringa, you can even start the seeds indoors and transplant them later.
Planting Moringa
1. Seed Germination
You can plant Moringa seeds directly in the soil, or you can start them indoors. Here’s how to do both:
Direct Seeding
- Spacing: Plant seeds about 1 inch deep, spaced 3 to 4 feet apart to allow for their spread.
- Watering: Keep the soil moist but not soggy. Overwatering can lead to seed rot.
Indoor Germination
- Soak seeds in water for 24 hours to enhance germination.
- Place seeds in small pots with potting soil, keeping them about an inch deep.
- Water lightly and keep them in a warm, sunny area.
- Transplant seedlings outdoors when they reach 4-6 inches in height.
2. Transplanting
Once your seedlings are healthy and at least 4-6 inches tall, you can transplant them outdoors. Dig a hole in your prepared area, ensure it’s well-drained, and gently remove the seedling from its pot to place it in the hole. Water it well after planting.

Caring for Moringa Trees
1. Watering
Moringa is drought-resistant but requires regular watering, especially in the initial stages. Here are some tips:
- Frequency: Water the plants every 2-3 days for the first month, gradually reducing frequency as they mature.
- Mulching: Apply a layer of mulch around the base to retain moisture and suppress weeds.
2. Fertilizing
While Moringa does not typically need excessive fertilization, a balanced fertilizer can help promote healthy growth. Use a nitrogen-rich fertilizer every 4-6 weeks, especially during the growing season.
3. Pruning
Regular pruning encourages bushier growth and maximizes leaf production.
- Time: Prune the plant when it reaches about 3 feet tall.
- Technique: Pinch off the top leaves to encourage lateral branching.
Pest and Disease Management
While Moringa trees are relatively pest-resistant, they can sometimes fall prey to aphids, caterpillars, or fungal issues. Here are some tips to keep them healthy:

- Natural Remedies: Use organic insecticidal soap or neem oil for pests.
- Companion Planting: Plant marigolds nearby to deter harmful insects.
Harvesting Moringa Leaves
You can start harvesting Moringa leaves once the tree is about 6-8 months old. Here are tips for effective harvesting:
- Timing: Harvest in the morning when the leaves are turgid.
- Method: Use sharp scissors or pruners to snip off the leaves, being careful not to damage the branches.
Sustainability Practices
- Rotation: Allow some branches to grow back after harvesting to ensure continuous growth.
- Drying Leaves: To preserve Moringa for later use, wash and air-dry leaves, then store them in an airtight container.
Year-Round Growth Tips
To cultivate Moringa all year round, especially in regions with cooler winters:
- Container Gardening: Grow Moringa in large pots that can be moved indoors during colder months.
- Greenhouse: If you have access to a greenhouse, it provides optimal conditions for year-round growth.
- In-Ground Protection: Wrap young plants in burlap or use blankets if you experience occasional frosts.
Conclusion
Growing Moringa leaves not only enriches your diet but also enhances your backyard with a beautiful, fast-growing tree. By following these simple steps and caring for your Moringa trees, you can ensure a plentiful supply of drumstick leaves year-round. Not only will you enjoy fresh, nutritious greens, but you’ll also reap the numerous health benefits that Moringa offers.
FAQs
1. How long does it take for Moringa seeds to germinate?
Moringa seeds typically germinate within 7 to 14 days, depending on environmental conditions.

2. Can Moringa be grown indoors?
Yes, Moringa can be grown indoors in pots. Ensure they receive adequate sunlight and warmth.
3. How often should I water my Moringa tree?
Water your Moringa tree every 2-3 days during the initial weeks, then adjust based on rainfall and soil moisture conditions.
4. What pests affect Moringa?
Common pests include aphids, caterpillars, and spider mites. Use natural remedies like neem oil to manage pest issues.
5. Can I eat Moringa leaves raw?
Yes, Moringa leaves can be eaten raw in salads or smoothies. They are best consumed fresh for maximum nutritional benefits.

6. What is the best time to prune Moringa?
Prune Moringa trees during the growing season, ideally in spring, to encourage bushier growth.
7. Are there any diseases that affect Moringa trees?
Moringa trees are generally hardy, but fungal diseases can occur in overly wet conditions. Ensure good airflow and avoid waterlogging.
By following this guide and addressing any queries in the FAQ section, you can create a thriving Moringa garden right in your backyard, ensuring a continuous supply of nutritious leaves for your culinary and health needs. Happy planting!
Leave a Reply